Use a whetstone, start coarse to fine, keep a steady angle, and finish with a strop.
I have sharpened knives for years as a home cook and pro kitchen helper. This guide on how to sharpen a knife pulls together hands-on tips, simple science, and step-by-step methods you can trust. You will learn which tools to pick, how blade geometry matters, exact motions to use on a whetstone, quick fixes with a honing rod, and safe maintenance habits that keep blades sharp longer. Read on to master how to sharpen a knife with confidence and keep your kitchen running smoothly.
Tools and materials you need to sharpen a knife
Start with the right tools. Choosing good gear makes sharpening faster and safer.
- Whetstones
- Use a two-sided water stone or oil stone with coarse (400–1000) and fine (3000–8000) grits.
- Honing rod (ceramic or steel)
- Ideal for daily edge alignment; not a substitute for sharpening.
- Strop
- Leather strop with compound for final polishing.
- Clamp or knife guide
- Optional for beginners to hold a consistent angle.
- Lubricant
- Water for water stones, honing oil for oil stones.
- Safety gear
- Cut-resistant glove and a stable work surface.
I prefer a 1000/4000 water stone, a ceramic rod, and a leather strop. Those three cover daily care and deep sharpening. The tools above will help you learn how to sharpen a knife effectively and safely.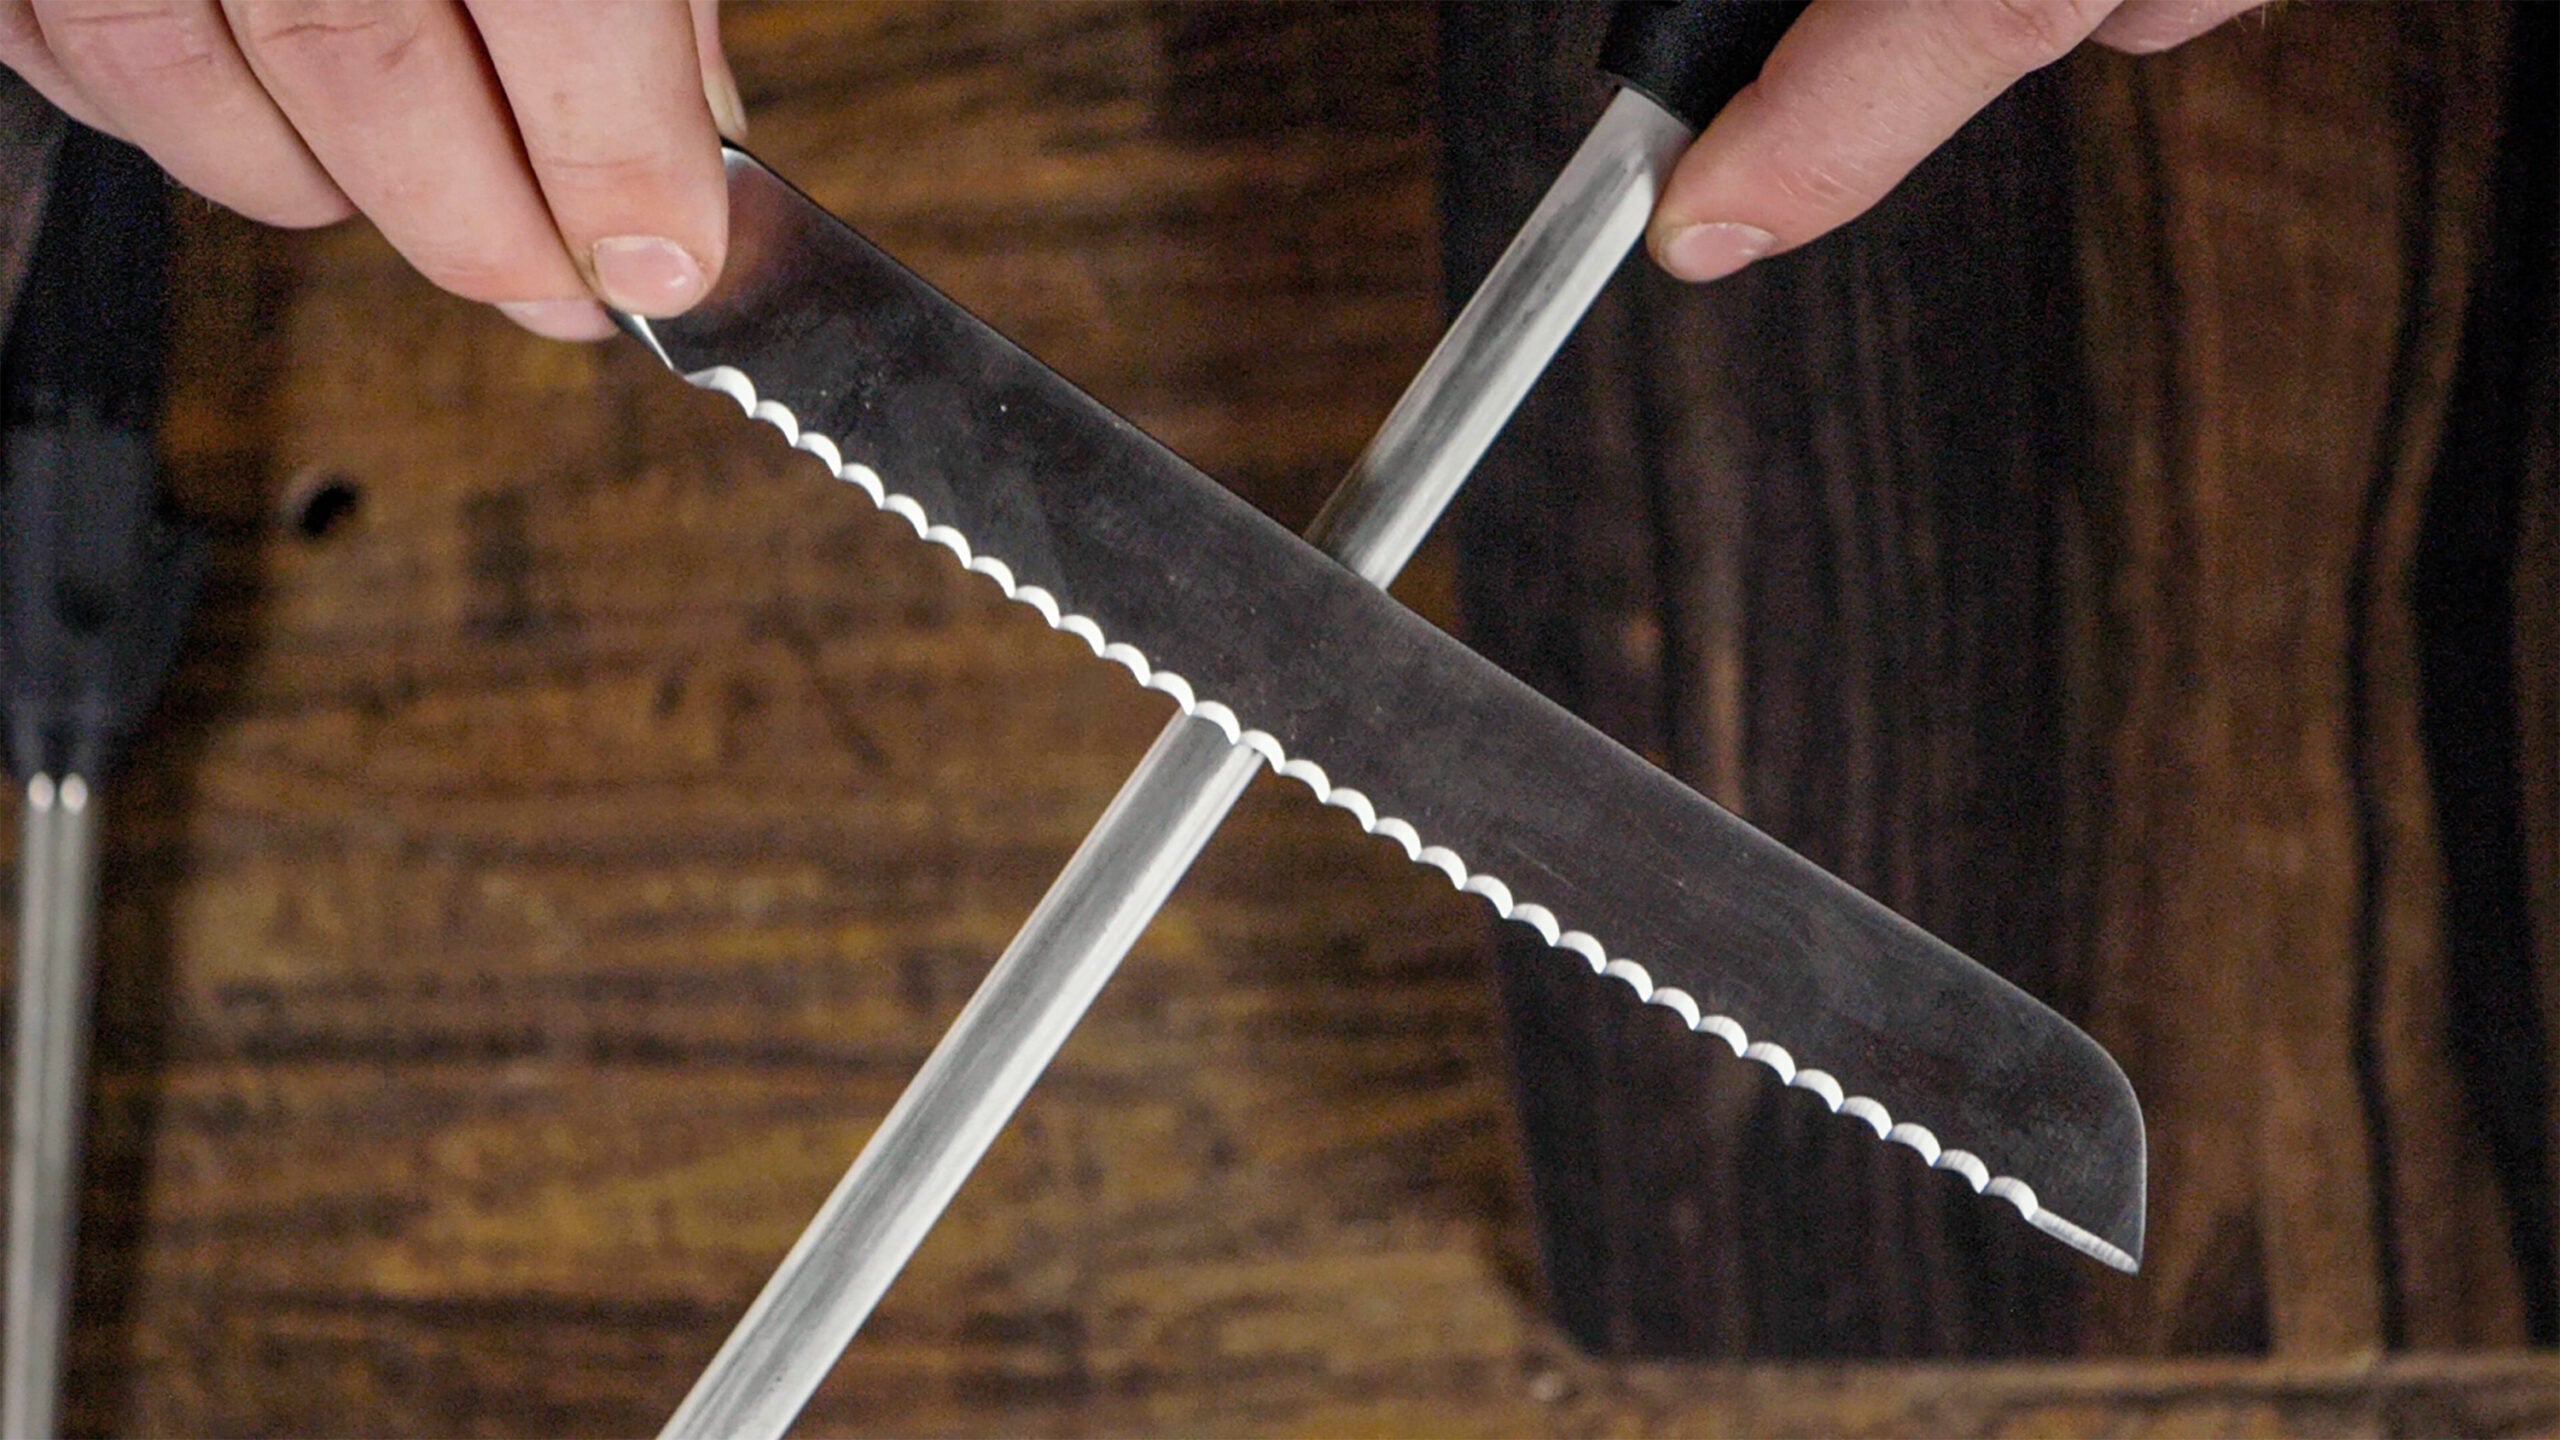
Understand knife geometry and why it matters
Blades have two key geometry features that affect how to sharpen a knife.
- Edge angle
- Lower angles (12°–15° per side) give a sharper edge but are less durable.
- Higher angles (18°–25° per side) increase strength for heavy use.
- Bevel type
- V-bevel: common, symmetric on both sides.
- Hollow, convex, or single-bevel: require specific techniques.
Match the angle to the knife’s use. A thin sushi knife gets a low angle. A heavy chef’s knife benefits from a higher angle. Understanding this is central to how to sharpen a knife well and to keep the edge performing how you need it.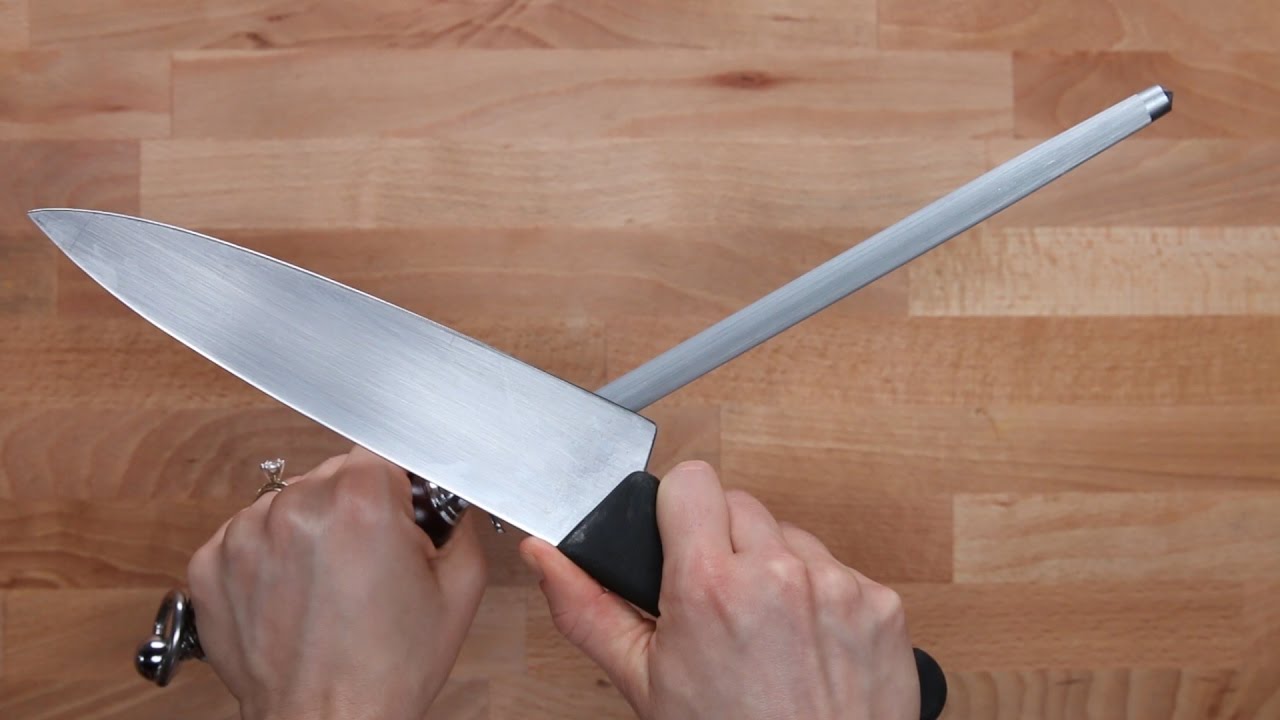
Main methods: whetstone, honing rod, pull-through, and electric
You can learn how to sharpen a knife using several methods. Each method fits a need.
- Whetstone (recommended)
- Best control and best edge quality for most knives.
- Honing rod (daily care)
- Realigns the edge; does not remove much metal.
- Pull-through sharpeners
- Fast and easy; can remove metal unevenly if used often.
- Electric sharpeners
- Convenient; can be aggressive if you don’t monitor angle.
My experience: I use a whetstone for full sharpening, a rod for daily alignment, and a strop for finishing. Avoid pull-throughs for high-end knives unless you accept faster wear. Learning how to sharpen a knife on a whetstone yields the best results and long-term edge life.
Step-by-step: how to sharpen a knife on a whetstone
This is the core of how to sharpen a knife. Follow these steps slowly.
- Prepare the stone
- Soak a water stone for 5–10 minutes, or follow the manufacturer’s instructions.
- Secure the stone
- Put the stone on a non-slip mat or towel on your workspace.
- Establish angle
- Hold the blade at the correct angle (12°–20° per side). Use a guide if needed.
- Start with coarse grit
- Push the blade across the stone away from you, spine leading, so the edge scrapes the grit.
- Use even pressure and cover the full edge from heel to tip.
- Repeat 8–12 strokes per side until you feel a burr.
- Check for a burr
- Run your finger gently (perpendicular) to feel a tiny raised wire of metal on the opposite side.
- Move to finer grit
- Flip to the fine side (3000–8000 grit). Repeat strokes with lighter pressure to refine the edge.
- Remove the burr
- Use alternating single strokes on each side to remove the burr and polish the edge.
- Strop for polish
- Drag the edge backward along a leather strop, spine-first, to remove microscopic burrs and polish.
Tips from my experience:
- Keep strokes consistent. Small changes in angle ruin the edge.
- Count strokes at first to balance both sides.
- Use water on the stone to carry away metal particles and keep the surface flat.
Practicing these steps will teach you how to sharpen a knife to a professional-grade edge.
Honing, stropping, and maintenance between sharpenings
Regular care keeps sharpening sessions less frequent and simpler.
- Honing rod routine
- Use a ceramic or steel rod before each use or weekly. Do 3–6 light passes per side.
- Stropping routine
- Strop after sharpening or once a week to polish the edge.
- Storage and use
- Use a knife block, magnetic strip, or blade guard. Avoid tossing knives in a drawer.
- When to sharpen
- If a knife drags, presses rather than slices, or shows visible nicks, it needs sharpening.
In my kitchen, honing before each use keeps performance high. I sharpen on the whetstone only when honing and stropping no longer restore the edge. This approach reduces wear and teaches practical ways to manage how to sharpen a knife over time.
Safety tips and common mistakes to avoid
Sharpening is simple. Mistakes can cause injury or damage the blade.
- Safety rules
- Work slowly. Keep fingers away from the edge.
- Use a firm, non-slip surface and a cut-resistant glove if unsure.
- Common mistakes
- Using too much force: this removes metal too fast and chips the edge.
- Wrong angle: inconsistent angles make a dull or rounded edge.
- Skipping burr checks: you may think the blade is sharp when it is not.
- Knife damage risks
- Over-sharpening reduces blade life.
- Using the wrong grit can leave a rough, weakened edge.
Learning how to sharpen a knife safely reduces risks and gives better outcomes. I once chipped a thin blade by pressing too hard on a coarse stone—an easy lesson to remember.
Troubleshooting: fixes for common edge problems
If your blade has issues, here are quick fixes when learning how to sharpen a knife.
- Blade won’t take an edge
- Use a coarser grit and more strokes to reset the bevel.
- Blade chips or rolls
- Start with a very coarse stone to remove the damaged area, then refine.
- Uneven edge
- Count strokes per side and check the bevel visually under good light.
- Stiff or sticky edge
- Make sure you remove the burr fully and strop the blade.
These fixes come from practice. If a blade is badly damaged, a pro reprofiling service may be best.
People also ask: quick answers
Q: Can you sharpen a knife with sandpaper?
A: Yes. Use progressively finer grits glued to a flat surface, but it is slower than a whetstone and needs care.
Q: How often should I sharpen my kitchen knife?
A: Sharpen as needed—many cooks sharpen 2–4 times per year and hone weekly.
Q: Will an electric sharpener ruin my knife?
A: Frequent aggressive use can remove too much metal, but occasional, careful use is fine for many blades.
PAA-style questions like these reflect the real concerns people have when learning how to sharpen a knife.
Tools and stones: what to buy and why
Choosing the right tools changes outcomes. This knife sharpening guide covers stones, rods, and powered options so you pick tools that match your skill and knife type.
Main tool categories
- Water stones and oil stones for manual, precise sharpening.
- Diamond stones for fast material removal and durability.
- Honing rods for everyday edge alignment.
- Electric sharpeners and guided systems for beginners.
How to pick stones
- Start with a medium grit 1000 for general sharpening.
- Add 400–600 grit for repair, 3000–8000 grit for polishing.
- Use diamond stones for very hard steels or fast work
Understanding angles and grits: the foundation of a good edge
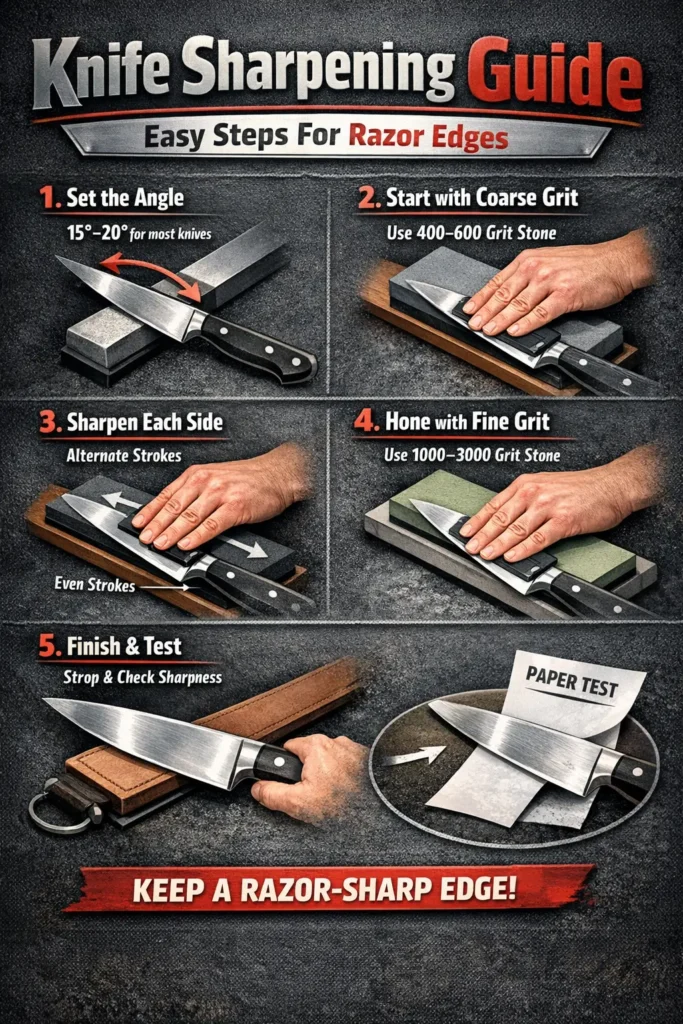
Angle and grit decide edge performance. This knife sharpening guide explains how to match angle and grit to knife use and steel.
Angle basics
- Western kitchen knives: 20° to 22° per side for durability.
- Japanese–style knives: 12° to 18° per side for a finer edge.
- Outdoor and bushcraft knives: 20° to 30° for toughness.
Grit progression
- Coarse (200–600) removes chips and reshapes.
- Medium (800–2000) rebuilds a comfortable edge.
- Fine (3000–8000+) polishes and refines for shaving sharpness.

Source: youtube.com
Preparing the knife and workspace before you start
Preparation makes knife sharpening step by step safe and efficient. Work on a flat, stable surface with good light. Clean the blade before you sharpen. Remove dirt and oil so you see the edge clearly. Secure the stone on a non-slip mat. If you use a clamp or guide, adjust it to the knife thickness. Always wear a cut-resistant glove on the hand that holds the blade if you are new to the process. These steps cut mistakes and keep the focus on technique.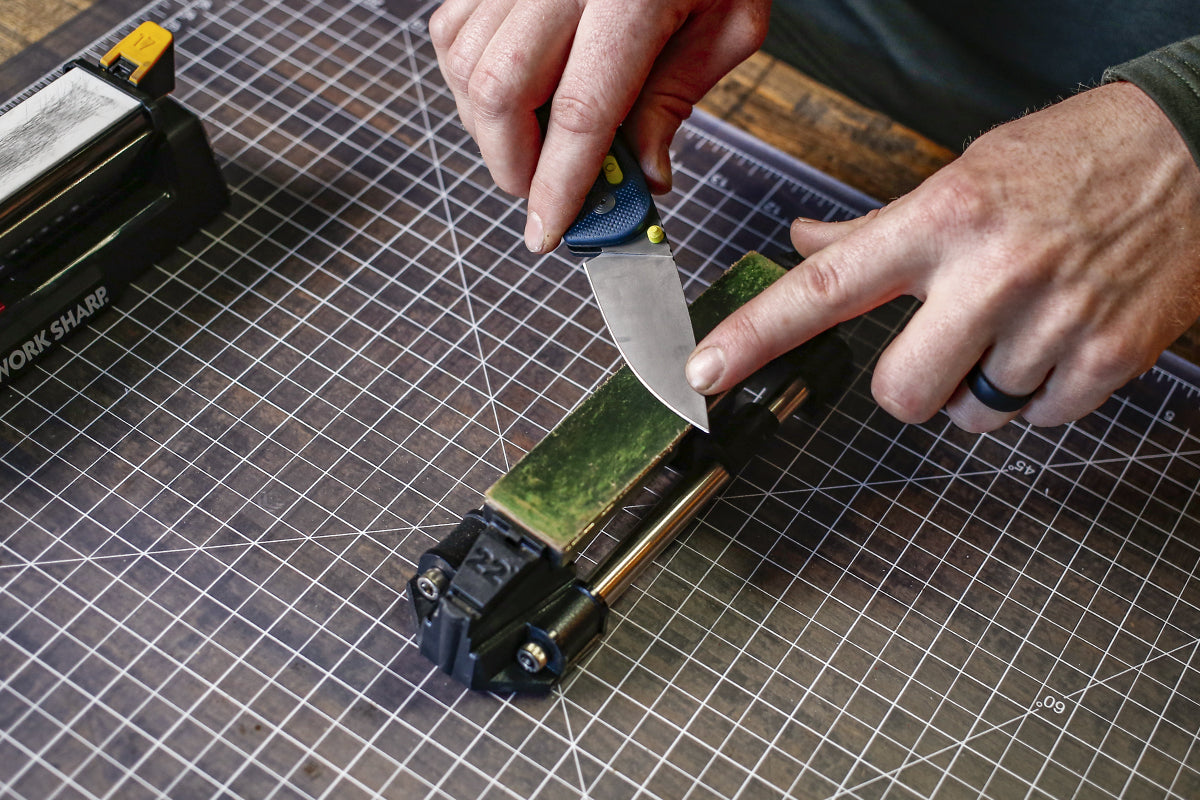
How to maintain your knife after sharpening
Maintenance keeps the edge alive and reduces the need for heavy sharpening. Follow these simple habits for long-lasting results.- Hone the edge weekly with a rod to realign the bevel. Honing keeps the edge true between sharpenings.
- Use proper cutting surfaces like wood or plastic. Glass or stone boards blunt edges faster.
- Store knives safely in a block or magnetic strip. Avoid tossing knives in drawers.
- Clean by hand and dry immediately. Dishwashers dull and corrode knives.
Honing and daily care
Honing keeps the edge true between sharpens. It is like brushing teeth between cleanings.
How to hone:
- Hold the rod vertical. Tip on a towel.
- Set your angle. About the same as your edge.
- Draw the blade heel to tip in a smooth arc.
- Do 5 light passes per side. Less is more.
- Use wood or soft plastic boards. Avoid glass, stone, or bamboo.
- Hand wash and dry right away. No dishwashers.
- Store on a magnetic strip or in a block.
- Wipe and strop before big prep days.
Follow this home knife sharpening guide routine, and you will sharpen less often.
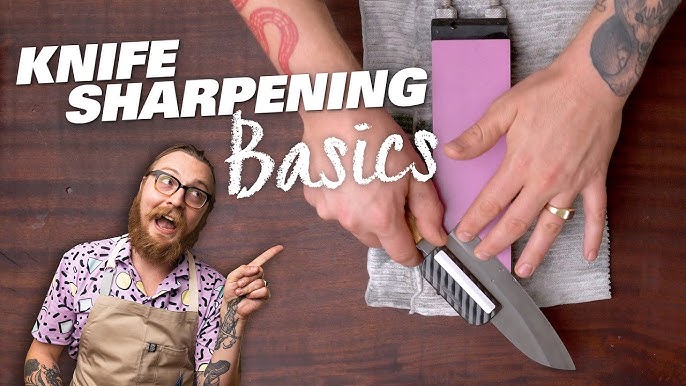
Source: youtube.com
Special cases: Serrated, cleavers, pocket knives
Serrated knives:
- Use a tapered rod. Match the scallop size.
- Hone each gullet from the beveled side. Light passes only.
- Remove any burr from the flat side with a soft strop.
Cleavers:
- Veg cleavers can be thin and sharp like chef’s knives.
- Bone cleavers need stout, higher angles. Skip high polish.
Pocket knives:
- Aim for 17–20 degrees per side for a tough edge.
- Finish with a strop for clean push cuts.
This home knife sharpening guide applies to all, with small tweaks by blade type.
Frequently Asked Questions of how to sharpen a knife
What angle should I sharpen my chef’s knife at?
Most chef’s knives do well at 15°–20° per side. Lower angles are sharper but less durable.
Can I use a sharpening steel to actually sharpen a dull knife?
No. A sharpening steel hones and realigns; it does not remove enough metal to fix a dull edge.
How long does it take to sharpen a knife on a whetstone?
A basic sharpening session takes 10–20 minutes for a single blade, depending on damage and skill.
Is professional sharpening worth it?
Yes, for high-end or damaged knives. Pros can reprofile and remove deep chips more quickly.
How do I test if a knife is sharp?
Slice paper, shave a tomato skin, or cut with minimal pressure. If the blade cuts cleanly, it is sharp.
Can I sharpen serrated knives at home?
You can, but serrated blades need a tapered ceramic rod or professional service for best results.
Does honing damage the blade over time?
No. Honing realigns the edge and is part of normal maintenance; it does not remove significant metal.
Is a higher grit always better?
Higher grit polishes the edge but does not replace coarse work. Use coarse grits to fix damage and fine grits to refine.
Will electric sharpeners damage my knives?
Electric sharpeners can remove too much metal if used improperly. Use them sparingly and follow manufacturer instructions.
What grit should I start with for a dull knife?
Start at 400–800 grit for mildly dull edges. Use 200–400 grit to repair chips or reshape heavily damaged blades.How do I know my knife is dull?
Try a paper test. If the blade snags or slides, it needs work. A dull edge also reflects light along the bevel.
Do I need multiple stones?
One 1000-grit stone can work. Adding a 3000–6000 grit makes edges cleaner and longer lasting.
Conclusion
You can learn how to sharpen a knife with a clear plan, the right tools, and steady practice. Start by understanding angles and choosing a reliable whetstone. Hone and strop regularly to keep edges keen, and sharpen fully only when needed. Take safety seriously and avoid common mistakes like inconsistent angles or excess pressure. Try a short session today: pick a mid-grit stone, set a steady angle, and practice 10–15 strokes per side. Share your progress or questions below, subscribe for more practical guides, or test these steps on a spare blade to build confidence.
Maliha Khatun has spent 5 years hands-on testing Japanese knives for everyday home cooks. She has evaluated over 60 blades across nakiri, santoku, gyuto, and petty categories — scoring each on edge retention, steel quality, handle comfort, and value for money. She writes to help home cooks buy the right knife without the guesswork.
Expertise:Japanese Knives • Vegetable Knives • Product Reviews • Kitchen Efficiency • Knife Care
Leave a Reply